The Newbie’s Guide to Hosting a Facebook Party
*Facebook makes updates often, and this info may be outdated. Check out the latest version of this article at The 2021 Guide to Facebook Parties*
First off, we want to say Congratulations! You did it!
You joined a new team of people who love what you love, and you’re so excited to start your new home business!
Now you may be wondering, “How do I start marketing this new business and generating sales from the comfort and convenience of my own home?”
The solution most Top Producing Direct Sellers find that work for them, is to host Online Parties in Facebook, and we are here to help!
So let us share 5 steps to help you host your first Facebook Party and help you get set up for success.
Step 1: Decide to Call Your Online Event a Party.
It’s important to refer to your Online Party as such, because in Facebook world, Events and Groups are two different sections.
Think of them as venues (places) for your Online Party.
For example, if you would host a face-to-face party in a home, or a party room at a restaurant, a conference room, etc, then you would hold your Online Party in a Facebook Event or a Facebook Group.
Here’s an article to help you understand the benefits of creating a Facebook Group to host your Online Party.
Step 2: Set Up Your Party
Before you can post your Party script, you will need to set up your group.
We suggest doing this about 3-4 days before the Party, because the less time a group is open, the better.
Keep in mind, you can always create an empty test group to get the hang of features and options.
Here’s an easy way to do this in Facebook.
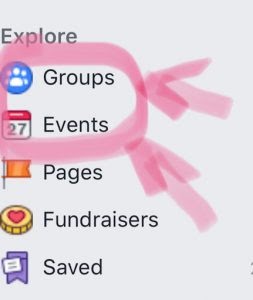
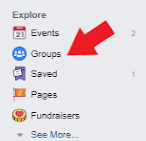
- Click “Group” in your Facebook menu, shown in the bottom of the left-most column.
2. Click the “Create Group” button near the top-right of the next page.
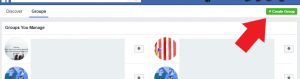
3. A new window will pop up where you can name your group and add members.
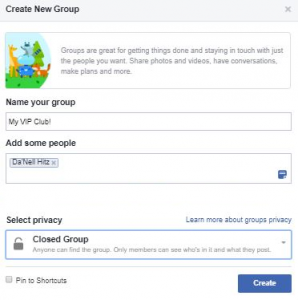
You will have to add at least one member to get it created right now, but you’ll be able to add or invite more members later on.If you choose to add your host right away, we suggest letting her know to wait a day or two before she starts inviting guests.This will give you time to finish setting everything up to encourage participation as soon as they join.
5. You’ll also be choosing the privacy setting you prefer from this dropdown box here, like Public, Closed, or Secret.

We suggest using the Closed Group option for Parties, to keep them private and personable.
- After you select your privacy setting, click “Create”. Your group is now created!Choose your favorite picture for the banner, add a short description with Party details and information, and add a couple of nice posts about yourself and your company.
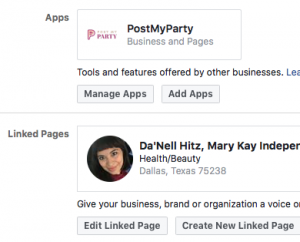
- Next, go into your Group settings to explore more options and features. Scroll down to the Apps section. If you enjoy the freedom of auto-posting programs, like PostMyParty, Facebook requires that you add them as a trusted app in this section. (Note: This option is currently only accessible from the desktop version of Facebook, not the Facebook app or mobile site.)
- If you have a business page already set up, scroll down to the Link Page section, and choose your page from the list to turn this group into a business page group.
Why would this be a good idea?
Because Facebook has a rule that doesn’t allow commercial sales or activity to be conducted from your personal profile. This includes groups and events created from your profile.
This is why Facebook has the Pages section, where you can create a Page just for your business (it’s like giving your business a Facebook profile, without creating another Facebook account.)
We have seen users benefit from the success of using business page groups for their parties, and you can learn all about why we recommend it here.
Step 3: Create a Template With Your Party Script
The next thing you need for your Online Party, is the actual content you’re going to post!
This is what is called your Party Script. To create one from scratch, we suggest posting a couple days of ‘Pre-Party’ posts that are designed to get guests interested and interactive.
These can be ice breaker questions such as…
- How do you know the host?
- What do you know about the company?
- What’s your favorite product? etc.)
Or create Posts that have guests comment or react such as...
- “What GIF reflects your mood on the weekend?”
- “Drop an emoji that shows how you feel about the party!”
Use these posts to get to know your new guests and create a dialogue.
This strategy also builds your post reach, so more guests will see the posts in this group more often.
For the day of the Party, we suggest 8-10 posts about a select few of your products/packages/services, and to even try a live video.
It’s important to know, Facebook favors Lives and makes them more visible to your guests.
Also, don’t forget to include a few posts for the day after the party to follow up and close.
Step 4: Use a Shared Template to Save You Time
If someone has shared a template of Party posts with you, follow the steps to save the template into an auto posting program, such as PostMyParty.
Then take some time to edit the content and pictures to make it unique to you.
For example, you can replace any corporate-made pictures, with your own photos of your products or services.
You can also use any generic photo editing program to add a filter, watermark, or even add text to the image to customize it for your parties.
Don’t forget to customize the wording of your post messages.
Here’s an easy way to do this:
- Identify the main idea for this post (whether it’s how to use a product, facts about your company, or the best sellers this month, etc).
- Imagine how you would talk about this with a new customer if you were face-to-face. What are your natural words you would use? What makes this information special to you?
- Look it over and tweak where necessary. It’s important that your content reflects your personality, and makes it unique from anyone else who also chooses to use the same template.
Remember, you don’t have to use every single post in a shared template! You can always remove any posts that are not necessary for your party.
Once you have your Party Script Template created, test it out!
You can keep an empty group just for testing out your templates so you can see how they look on Facebook.
When you’re ready, don’t forget to schedule the Party in your auto-posting program.
Here are a couple of tips:
- Don’t forget about any Replacement Tokens in your template. This feature helps keep your parties unique, by automatically inserting specific info such as the host name, shopping link, and more.
- Review your party details. Make sure you double check your Party posts and the unique Content Rating Feature offered in PostMyParty.
This feature will rate how unique your content is compared to what’s already been posted to Facebook. If you see any of your posts marked yellow or red, you might tweak the wording of those posts now.
- Make sure your posts are spread out. We suggest keeping your posts at least 3-5 minutes apart, if not more. Posts leaving your account too fast can raise a flag with Facebook. They might think your account got hacked and may start investigating.
Remember, you can still edit any posts before its scheduled time.
Step 5: Have a Blast During Party Time!
The best strategy to any Party is to get excited and participate!
Don’t just set-it and forget-it.
It’s important to follow your own posts as they go out, so you can comment and reply to your guests.
If Facebook sees that you are building community, they will show your stuff to more people. And using an auto-posting program that you can trust, like PostMyParty, creates the freedom you want that allows you to be more involved in building relationships with your host and new customers!
After the Party is over, remember to follow up and follow through.
You can do this by sending personal messages to your guests about how much you enjoyed having them at the Party, close their orders, and book more Parties.
Remember to send those orders, prizes and giveaways within a couple of weeks. And nurture that relationship with your host!
This is also the perfect time to funnel your new friends to your special VIP group just for your favorite customers, where you can schedule special Party Script Templates and live videos just for them. Learn more about what else you can do after the party, here.
We hope this is helpful to get you started with hosting your first Online Parties.
Let us know how much fun you have!
Next Steps
Trying to grow your business with Online Parties or trainings?
Now you can leverage powerful Online Parties without hours of work.
Get a Free 14 Day Trial of PostMyParty.
For 14 Days you’ll have access to:
- Full UNLIMITED Access to ALL Features
- Unlimited Scheduled Parties
- Unlimited Templates
- All Your Content is Private
- Comment Scheduling on Business Pages and Business Groups
- Template Sharing
Plus Bonuses!
- Access to a Private Facebook Strategy Group
- Live Support 7 Days a Week


.png)